If you have 15 minutes to spare this lady is very inspirational and talks a lot of truth!
Enjoy
Bevx
If you have 15 minutes to spare this lady is very inspirational and talks a lot of truth!
Enjoy
Bevx
For me, this posture is the first one of the major balancing postures – I feel it is part of a “group” together with the Standing Bow Pulling Pose and Balancing Stick. These three postures will work you out physically but really allow and in fact demand from you an increase in concentration, focus and determination of the mind. I really enjoy them actually as I like the challenge!
For beginners, this is likely to be the first posture where you really get to realise how important it is to lock the knee. I have been told several ways to think about the locking of the knee – one was to “suck” the muscle to the thigh bone and pull up the knee cap. After a number of classes you begin to experience “muscle memory” and it will get to feel more like a normal action than it is when you first try it! It will become second nature – eventually, I promise!
In order to write this post I have gone back to my original posture clinic notes and I came across this tip and for some, this may help. Instead of concentrating on tensing and tightening the leg muscles, you may like to relax and bow the leg back instead. I had completely forgotten about this until I read it this week!
I am a strong believer if you relax into the postures first instead of resisting them (and even trying too hard) you will greatly improve not only your yoga but it does wonders for your whole well-being too. This is a part of big subject and something that I have been looking into over many years but it is interesting when I found this note as basically it is saying the same thing! So if a locked knee is not yet your speciality you may like to change the focus and relax and bow the leg instead!
When you start this posture you shift your weight slightly to the left leg and lift up the right foot. You will need to interlace the fingers right to the webbing and ensure your thumbs are crossed underneath the foot so you get a good grip and able to keep it throughout the posture! If you pull your stomach in as you do this, you will be stronger and it will also help your spine as it prevents backache. The correct position to hold the foot is three inches below the toes.
Now for the focus of the eyes, which if you have read any of my other posts, will absolutely make you stronger in any posture. You don’t have to have your eyes bulging out of their sockets, just a gaze at your left knee in the mirror will work wonders!
Now before you go any further in the posture you must ensure your left knee is locked. I find it helpful if you imagine your leg going down into the ground just like the infamous “Bikram speak” “concrete lamp post”- unbroken – no knee!! If your knee is not locked do not kick out, just stay there in that position until you gain strength as you do not want to put pressure on a bent knee.
Now it’s time to inhale and slowly kick your right foot towards the mirror until the leg is parallel to the floor – no higher – no lower – at the same time maintaining the lock on the left knee! WHAT?? you say – yes ‘fraid so – but one day muscle memory will kick in and you will!
Taking another deep breath, continually kick the foot away from you towards the mirror. Another tip I just got reminded of was instead of focussing on straightening the raised leg, change the focus to pulling the toes back towards you and pushing the heel towards the mirror. Sometimes just looking at something differently can produce a better result so you can try it! Don’t forget that pesky left knee to stay locked. While you are in this stage, open the chest – whenever you do this you will have more energy to hold the posture.
If you fall out even after a few seconds, “bank” that success, and go back in. Use the whole minute even if you drop out of it several times. Do not judge yourself but just regain your gaze, and as they say in the UK – keep calm and carry on! Eventually all the seconds in the posture will add up to the minute or half minute depending which set you are on.
The aim is to eventually get both legs locked and looking like an upside down “L” shape and only then it is time to pull your stomach in (if it isn’t already) and bring the elbows down by the side of the calf muscles and eventually they will go down below the calf. The arms get nicely toned at this point!
Head to the knee is the ultimate aim but you only go for this if you have both legs locked. In order to do this you need to change your gaze to your standing big toe, tuck the chin right in so you compress and then your head has a chance of landing on the knee. If your head is below the knee you will not get the compression that the posture is aiming for.
If you are not ready to attempt the final advanced adjustment – no worries. It may take a while. When you feel comfortable enough with your balance you may wish to give it a go. Step by step is the Bikram way for all these postures.
Then you get to repeat the whole process on the other leg! The first set is held for a minute on each side and the second one is an easier 30 seconds only. Try not to think about the time while you are in the posture just keep your attention on the adjustments and the seconds will be over before you know it! I have found it is always easier to be “pro-active” in the posture rather than just hang in there waiting for it to be over! You will improve much faster this way too.
Next one in the Posture Series is the Standing Bow Pulling Pose. I will post some other posts in the next couple of days too.
Enjoy!
Bevx
If you’ve ever done a Bikram class you should have experienced the incredible peace you get after the class that usually lasts quite a while. The body can even tingle all over for hours and you can sleep like a log! However what about when you are in the class itself? Is it possible to feel that peace when you are challenging yourself in so many ways? When you first start it may not feel like it as the mind often wanders, you’re busy checking out the other students’ postures, often comparing yourself and all sorts of other distractions (such as the heat) can manage to get your attention.
However there are a couple of simple pointers that can be put into action straight away that I personally have found to really have a beneficial effect not only on my postures but also my whole class experience.
Now I know this one is obvious and you should have heard it many times but make sure you drink lots of water before you come to class. You do sweat a lot in a Bikram class so obviously you need to be hydrated before class and also after class to replenish what you have lost.
However, I was always a bit concerned that if I drank too much water I would need to go to the loo mid-class so I would not drink as much as I should! It was a belief that I used to limit myself with and I can so see that now. I finally got over myself and started to drink a lot more than I used to and that addition alone made such a difference to my strength. The difference in how I felt, how much stronger and calm I was in the postures, was like night and day. I know it is such a simple thing but when you’ve been stuck with a limiting belief for many years and finally kick it – it is a great feeling.
A lot of energy can be wasted by huffing and puffing through the mouth during and in between postures. Again I was guilty of that for a long time and more recently another teacher just happened to mention to breathe through the nose instead of the mouth particularly when standing in between postures. The room I was practicing in at the time was incredibly hot and humid even for me, and it really helped me stay calm and bring back my attention and focus rather than letting the mind go all over the place and allowing the internal chatter to have a negative effect. Again it was an instant realisation that something so simple could have such a beneficial effect.
Those are the things I love – small adjustments but with big results. I hope they help!
Bevx
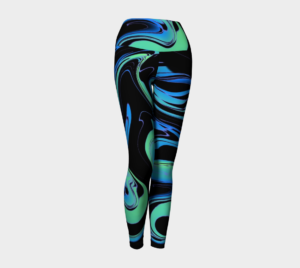 Over 80 different Yoga Leggings designs are now available in several sizes. They can also be purchased in a plainer style in both long and capri lengths. These can be used for yoga and also as a welcome addition to any wardrobe!
Click here to go to the shop and browse the many designs available.
Over 80 different Yoga Leggings designs are now available in several sizes. They can also be purchased in a plainer style in both long and capri lengths. These can be used for yoga and also as a welcome addition to any wardrobe!
Click here to go to the shop and browse the many designs available.