Well, as promised here are a few more details about this posture. I went a bit OCD so if you don’t want to read all this you can scroll down to the summary for the main points – of which there are many in this one! These tips are not for home practice by the way – they are for students that already go to a Bikram class where the environment is specifically geared to accommodate the Bikram method of doing yoga. It is merely for those who may enjoy understanding a bit more about the postures they already practice in class.
The Half Moon is a “full-on” posture as it really works both the outside and the inside of the body – in fact it’s like a mini workout in itself! The first set is held for one minute on each side and the second set for only 30 seconds which feels very fast compared to the first set!
I must say this used to be the posture I would dread! When I first started do you think I could get my arms anywhere near my head or even pointing upwards? Not a chance! – they were very much pointing out in front of me and I found the posture extremely hard. It is difficult to explain how that shifted but shifted it did. One thing I had to change however was how I felt about the posture – as I said previously I could not wait for this posture to be over and I used to fear it and do it with such trepidation! I will try and explain more in later posts how you can change how you feel about a posture and it is not something that may happen immediately but once you do you will find a big difference.
Anyway here is a run down of the posture that may help:
The Side Bends
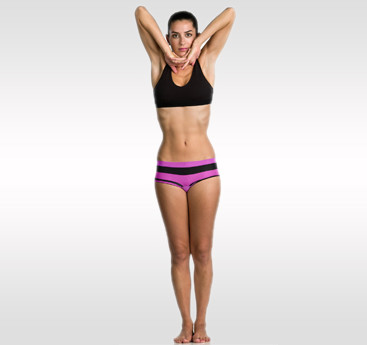
First of all there is a warm up as this is the first stretching posture in the series. The hand grip should be tight with the palms together right down to the wrist. They can sneakily come apart during the posture but every effort you make to glue the palms together will strengthen the arms eventually making the posture easier. Stretch up as high as you can and bend a few times from left to right making sure you feel the stretch on each side of the body. The posture is called “Half Moon” so the body should make a crescent shape!
After the warm up, its time to work on the initial alignment. Try and keep your head glued in between your raised arms rather than allowing the head to drop and causing a droop and a bent neck. Again easier said than done in your early classes I know – but I am a strong believer if you take care of the alignment in the early classes it will be easier in the long run and again become more automatic. Your elbows should be locked to ensure no bent arms – as you get used to the straight arms you will feel stronger quicker. This can be an area that is difficult but one day you may find all of a sudden your arms are straight. That is exactly what happened to me so never think what you are experiencing today is what you are stuck with. Things can change and sometimes surprisingly quickly.
Naturally as with many Bikram postures you start with toes and heels together i.e. feet facing forward not “ten to two” and legs together not apart. You have a much stronger base if you have your feet and legs together. Bring the weight on to the heels. Of course as usual with Bikram postures you need to lock the knees which really means lifting the knee cap up as much as you can. You do this by contracting your big quad muscles – one teacher suggested almost “sucking them to the bone” to ensure the knee cap is lifted. If your knees are bent you will put too much pressure on them and you don’t want to feel “weak-kneed” in this posture! Of course locking the knee is not a normal daily action so it takes a bit of doing to keep it consistent but if you are a beginner just work at it second by second. After a while it will seem very normal and will be almost automatic.
Remember to keep the weight on the heels as there is tendency to lift one up and place the weight on one foot but both heels should be on the floor and the weight distributed.
The hips are slightly forward to open up those lovely hip joints and the upper body leans back a little to open up the chest and rib cage. When the chest is open you will feel a lot stronger physically than if you are “pidgeon-chested”. Bikram Yoga postures are specifically designed to open up the body – again something that we may not naturally do.
Make sure your chin is away from the chest so you can breathe easily and before you start meditate, concentrate and focus by keeping your eye fixed on one spot. Just that action alone gives the body such increased strength – you’ll be amazed!
Before each side bend take a deep breath and stretch up to the ceiling first then slowly stretch to the side. It is much better to stretch just a couple of inches to the side and stay in that strong alignment than it is to bend over a foot and be twisted – tempting though it is when you look in the mirror! You will whittle down those hips and waist easier too as you will feel an intense stretch on the other side of the body. The side that is compressed is working on your internal organs. Learn to love that feeling!
So what about the breathing? More recently I had this clarified – take a deep breath as you stretch up to the ceiling, hold it until you are in the side position and then breathe normally. If this is not easy for you just breathe normally throughout – but whatever you do don’t forget to breathe or you will tire quickly!
A minute does seem a long time but if you move slowly and “be” the posture rather than “do” it, it will pass quick enough. Just keep your ear on the dialogue and adjust as necessary – there is always something to pass the time with! Like pushing your hips “beyond your flexibility”! There are reminders throughout the dialogue to keep you in the right alignment. Rolling the opposite hip slightly forward and then bringing the bent side’s shoulder forward slightly so that the chest is opening more and almost facing the ceiling is the last adjustment. In the last 3 seconds or so go a little bit past the comfort zone and push more! Inhale as you come out and stretch up to the ceiling before doing the other side.
The Back Bend
Then of course there is the back bending part of the posture. Again the dialogue will keep you safe as it gives you step by step instruction. As a beginner, the first thing you have to get used to is to let your neck relax and drop the head back. It will be impossible to do any sort of backbend unless you let your head go back first. As in many other postures your head will lead you. So concentrate on that first or should I say relax first! When you are in the back bend bring the arms back towards the head – as much as you can anyway. Again this will come when you are more comfortable in the posture. As you push your hips forward and keep the weight on the heels you will be very safe! Eyes open of course – always.
The Forward Bend
The last part is the forward bend. Bend your knees if you need to so you can put your hands on the floor in front of you. Loosen out the hips and squat right down if it helps you to loosen the lower back. Move slowly and always be aware of your own body in this moment. Once again there is a Bikram grip where you have to get as low as you need to grab the heels from behind so that the pinkie fingers touch and the elbows stay behind the calf muscles. Quite a feat but do whatever you can and work on that each time. Using that famous grip (fingers together with the thumbs) you stretch your body down from the lower spine but only as far as your body stays glued to the legs. If the body and legs come apart you have lost the integrity of the posture. So once again it is better to keep your legs bent with the body glued to the legs that have straight legs and the body away from the legs. You are wanting to create the infamous “Japanese ham sandwich” effect! It is the continuous pulling on the heels “without interruption – without intermission” that may eventually allow you to lock the legs. If this is a long way off for you it doesn’t matter – as long as you are keeping your body jammed to the legs and pulling on those heels you will still get 100% benefit.
As with all the postures in the Bikram series you can always get 100% benefit even if you don’t get to the ultimate position – the dialogue will give you detailed instruction to get the most benefit for you. It’s not about having to be perfect in the posture but a case of sticking to the instruction. This way improvements will be fast and you will always be getting the most benefit for you that day.
The second set should feel easier and is only half as long – yea!
That was a bit of a long essay but it is a big posture! It will be impossible to adjust or even think about all this in one go so just work on one or two points in each class and go from there!
Summary of the main points to look out for:
- Concentrate and fix your gaze on one spot to give you focus and strength
- Keep breathing with your chin away from the chest
- Palms glued to the wrist throughout the posture
- Locked elbows and locked knees throughout the side bends
- Lean back a little to open the chest and push hips forward
- Stretch in alignment even if only a few inches
- Push or “sway” your hips out to the side “beyond your flexibility”
- Weight on the heels – both heels on the floor
- Hold and push a little more in the last few seconds of the side bend
- Relax the head and neck before the back bend
- Arms back towards the head in the backbend
- Hips must be forward towards the mirror by squeezing the butt muscles and keep the weight on the heels for a safe backbend
- Eyes open – always
- Get the proper grip on the heels and continual pulling in the forward bend
- Keep your body together with the legs even if you have to keep your knees bent
- Do the posture with “your smiling happy face”!
Some of the benefits of the Half Moon posture are:
- Great for slimming and toning the waist, hips, abdomen, and buttocks
- Encourages the internal organs to function properly
- Aligns the skeletal system
- Strengthens the arms
- Good for focus and determination
- Opens up the body
- and more….
Next up will be Awkward Pose in a few days time. I will try and make it shorter!
Have a great weekend everyone!
Bevx