Bikram Yoga Classes in Jersey

Please share if you like this site

  • Home
  • About
    • About Bikram Choudhury and his Yoga Method
    • About the Teacher
  • First timers
  • Classes
  • Blog
  • Yoga Wear

Posture # 8 – Standing Separate Leg Stretching Pose

May 22, 2015 By Beverley Brown Leave a Comment

Up to Number 8 already?  Here goes…

I LOVE, LOVE, LOVE this posture – I find it very relaxing hanging upside down and feeling the insides of my legs toning as I do it!  Of course you don’t just hang there for the whole posture – this is Bikram Yoga after all! Here is the process:

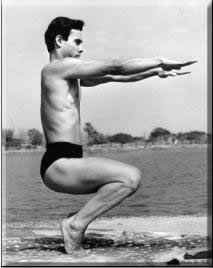
Preparation for Standing Separate Leg Stretching Pose

From the feet together position bring the arms up over the head and take a big step to the right with your right leg – at least 4 feet.  The wider you go the easier it is and it will tone up those inner thighs a treat while you’re at it!  The feet should be pigeon-toed unless you have sciatica when it is best for them to face straight ahead.  Correct alignment always helps with the posture so make sure your heels are in one line – as if you could draw a straight pencil line behind them.  I know it sounds a bit fussy but it truly is worth it as you will improve much faster in the postures if you take care of the details.  At the same time bring your arms down so they are parallel to the floor.  Nothing floppy about those arms – you need them tight and firm keeping your fingers and thumbs together.

Going down….

Suck the stomach in (makes you so much stronger, gives you great tone and feels fab too) and slowly bend down from the lower spine towards the floor.  Now the head stays up, with the chin forward so you can see yourself in the mirror for as long as possible.  The knees should be locked (it is Bikram Yoga after all!).  Grab your heels with the usual Bikram grip –  meaning thumbs and fingers together – no air holes!  If you can’t reach the heels grab the outsides of the feet.

Now we get to the Bikram technique – not just hanging there but using your arm and back muscles to pull on the heels as hard as possible to stretch your body down further to the floor.  Keep the knees locked throughout the posture and roll the body weight onto the toes.  The aim is to touch your forehead to the floor.  Of course you may be quite a way off so in that case you should widen your feet as much as possible which will automatically bring the head down lower.

This is not a passive posture so once you are in position you keep pulling continuously, eventually the spine will straighten from the coccyx to the neck and your forehead (not the top of the head) will touch the floor between the feet. Simples! ( I jest!)

This posture will first stretch the legs, then the hips, then the lower spine and eventually the whole spine will get a workout and you should feel a stretch from the coccyx to the toes, and coccyx to the forehead.  

If your head is nowhere near the floor in the first set, make your stance wider for the second set.  If you are pretty flexible and your head touches the floor – bring the legs in a bit to make it more of a challenge – if you like that sort of thing of course!

If your legs are locked you can even try bringing your forearms in a bit so they touch the calf muscles.  This will really give you great arms too!

Just a quick tip that helped me – I used to struggle and strain in this posture until one teacher told me to just RELAX into it first and let the weight of my head pull me down and then “give it some welly” once in that position by using the arm and back muscles to pull the body down lower to stretch the spine more.

Summary of the main points of Standing Separate Leg Stretching Pose:

  •  Step to the side as wide as you can
  • Keep the knees locked throughout the posture
  • Keep the head up, chin forward and look in the mirror as long as possible
  • Suck the stomach in to the spine
  • Grab the feet as instructed – you need the leverage
  • Don’t just hang there – pull on the heels to stretch the spine more
  • Aim for forehead to the floor in between the feet
  • Roll the weight on to the toes
  • Once more advanced and with locked knees bring the forearms back so they touch the calves

The benefits of  Standing Separate Leg Stretching Pose:

  • Tones the legs and hips – especially the often fleshy inner thighs!
  • Tones the arm and back muscles – great definition!
  • Brings blood to the head and face
  • Pulled in stomach will ensure all the organs are in place

Enjoy

Beverley x

Filed Under: News Tagged With: Bikram Yoga, inner thighs, spine, Standing separate leg stretching pose, standing series, thighs, Yoga

Posture No 3 – Awkward pose…. Awkward as…..

April 7, 2015 By Beverley Brown Leave a Comment

Bikram Choudhury in Awkward PoseIf you have ever attended a Bikram class you will be aware that every posture comes with a full set of “instructions” in order to place the parts of the body in the optimal position.  No less with the Awkward Pose!

When doing this pose you will probably feel what it is doing to the legs but be aware it is also working big time on the arms, spine and the heart and a lot of internal areas as is normal for any posture.  By the way it works a treat on breaking down cellulite and toning up those thighs like nothing else does!  So I will include a few of the details that help you get the best out of this posture.

First part:

Firstly the feet should be 6 inches apart with the feet going straight out in front of you – like a perfect letter “H”. If you have the feet in a slight “V” shape (five to one on a clock face) you have already changed the dynamics of the posture.  You shouldn’t even be able to see the heels in the mirror – glue your feet to the floor at this stage!

Bringing the arms up will obviously be working on the heart and it is important to really stretch the arms out right to the fingertips as if you are trying to touch the mirror.  This will also ensure you are strong in the posture, great for your balance and tones the arms up like billy-oh too. “Nothing loose, nothing hanging” – as it says in the dialogue!

Exhale the breath as you need now to suck the stomach in and hold it in.  This area of the body will also give you a lot of strength when pulled in and it also has a positive effect on your organs and even your emotions – if you just let your stomach flop the posture will feel harder to achieve, you’ll just be hanging in there and wasting effort.

Now it is time to sit down until the “hips touch the chair”, spine as straight as possible and with the maximum weight on the heels.  This will assist with straightening the spine ( just like in Half Moon).  The focus should be on pushing the spine backwards.  Remember to keep pulling in that stomach until you can see your rib cage in the mirror.

By this time those pesky knees may have tried to find each other and meet up somewhere in the middle so its time to check that and ensure there is still six inches between them, also the toes (no “V” happening!), heels and even your hands.  Chest up, chin up – so you can breathe and you will feel stronger.  All the time you are trying to lean back to the back wall – almost trying to fall down backwards!

Inhale breathing and come up.

Keep your arms where they are.

Second part:

I make sure my eyes are focussed throughout this posture as I find it really increases my strength and stamina but in this part of the posture it is imperative and hence it is in the dialogue.  “Concentrate and meditate”.

Stand up on the toes as high as you can, making sure you have your concentration and focus on one spot in the mirror.  Now stretch everything up to ceiling – your spine, chest and head, upper body before slowly sitting down but this time with the weight on top of the toes with the spine straight.  Throughout this part it should feel like your hips and back of the head are touching the wall – “Bikram speak” for “straight”!

This time though, you sit down halfway until the hips touch the chair but not too low.   Then it is time to lift the knees up, lift the chest (gives you a lot more strength), lean back to straighten the spine again.  Come up higher on the toes (i.e. lift the heels up more) and continually lift the knees. Make sure that the hips have not sunk too low – they must stay at the height of the imaginary chair and not be lower than the knees.

Inhale as you come out, keeping your arms in the same position, flattening the feet for a second or two – phew!

Third part:

This time you come up a little bit on the toes and now you can do what you have probably wanted to do all along and bring the knees together! Squeezing those knees together will tone up those inner thighs as an added bonus.  Exhale as you suck the stomach in and keep your spine straight as you go down as slow as possible, taking at least 10 counts – ( I know – tell me about it! ) – all the time as if you are leaning against a wall.

Continually stretch your spine to the ceiling until you have 1/2 inch between the hips and heels.  At this point take care not the sink on to the heels, you do this by keeping your knees together and pointing them slightly down towards the mirror.  By this time your arms, and legs will be parallel to the floor and the spine straight in a 90 degree angle, as if you are like a three sided box.

To come up in control take a deep breath and keeping the knees glued together come up with your spine straight trying not to lean forward.   Always move slowly – there is power in slow movement.

On the second set if you have good knees you can do the famous Bikram motorbike riding to make sure you have control – but do NOT do this if you do not have strong knees – always take care of the knees!

As usual, ensure your shoulders are relaxed throughout the posture – there is no need to create tension where you do not need it!

Summary of the main practice points:

  • Keep the feet glued to floor once they are there and make sure they stay like an “H” – not “V’
  • Keep your focus by gazing at one spot in the mirror
  • Suck the stomach in
  • Try to touch the fingertips to the mirror – i.e. straight arms – nothing loose, nothing hanging, contract the arm muscles
  • Open the chest to gain more strength and stamina
  • Try to straighten up the spine as much as possible
  • Do not let the hips sink down lower than the knees
  • Keep the correct position of the knees depending on which part of the posture you are in

With every posture there are benefits on many levels – the main ones for Awkward Pose are:

  • Stimulates the internal organs for correct functioning
  • Tones and strengthens the arms
  • Tones and strengthens the legs
  • Works on the heart
  • Assists with straightening out the toes
  • Breaks down cellulite – bonus!
  • Great for your abdominal muscles
  • Gives lovely muscle definition on the thighs
  • Strengthens and aligns the spine

Filed Under: Posture tips Tagged With: awkward pose, Bikram Yoga, heart, posture, posture hints, posture tips, slim legs, spine, tone legs

What’s the difference between yoga and sport / fitness?

March 25, 2015 By Beverley Brown Leave a Comment

All movement of the body is great – after all you need to move to maintain flexibility and strength in the body for starters.  It also helps the mind to get clearer – one of the keys to your body feeling  a lot more ease.

I’m not a runner but I know lots of runners who say that their sport allows them to go into the “zone” and when they are they in the zone they feel like they can run a lot easier and further etc etc.   It is the same in yoga when you obtain that mind / body connection you can experience a lot more ability and ease in the body.

But what then is the main difference with yoga?   Once again it is a massive subject but in the context of this post if you check out the page on this website (bikramyoga.je if you are on Facebook) about Bikram he boldly states:

“ Yoga is the only exercise on this planet from which you gain energy instead of burning energy. ”

He also went on to explain in class that consistent sport can wear down (or even damage) parts of the body after a long period of time or if there is a repeated action on one side of the body such as in tennis etc.  Some sports can also create a lot of tightness in certain areas of the body.  If you are an athlete you will probably relate to some of this!

So what does Bikram mean by that and what is the difference with yoga? It is that yoga works from the inside of the body to the outside not the other way round.  Every yoga posture (in the Bikram Yoga series at least) will work the spine – the “backbone” of your body – the “backbone” of your life in fact!  It has a knock on effect on your glandular system and therefore the organs and so it goes on!  Without a healthy spine, many parts of the body would be compromised not only physically but internally too.  Together with the brain, the spine forms the body’s nervous system which is essential for maintaining mental and emotional health which in turn is a major contributor to bodily health.   Suffice to say the spine is the centre of your body and it affects every other part.   With regular practice of yoga you will begin to realise that everything is linked and yoga is therefore is a “wholistic” method of exercise and also a completely natural type of “medicine” so to speak!

So what does that mean – you shouldn’t do sport? – of course not  – I’m a great believer in doing what you love as that in itself is a major reason to do it!  However it may be a good idea to incorporate a regular yoga practice to counteract the wearing down of tissues and the muscle damage that can occur.

Yoga is actually a “generator” of your body and does not deplete it or wear it down – it actually rejuvenates and can even reverse and at least halt the aging process.  This subject is my favourite of course but it will need a few more posts to talk about that!  It’s all about that “life force” (and more importantly what you do with it) that I mentioned in my earlier post.

I hope this explains at least a bit so you if you don’t like sport or normal fitness classes OR if you love it and want to stretch out and repair the body you may wish to give yoga a go!

Bev x

Filed Under: Athletes and Sport, General, Newbies and nearly newbies, News Tagged With: athlete, athletic, brain, cycling, emotional health, mental health, nervous system, physical health, spine, sport, tennis

Posture No 1 – Pranayama breathing a.k.a. Standing Deep Breathing

March 24, 2015 By Beverley Brown

Well as promised I will give some more info on the postures.  Because of timing and the already detailed instruction there is not much time to add in more in the class so I hope these blogs will help!

yoga girl doing Bikram Yoga's standing deep breathing posture

Every Bikram class starts with Pranayama Breathing – 10 sets done twice.  Bikram always told us that this actually was the most important posture of all! Why? Because it gets the heart and lungs to work together properly providing a smooth flow of life force through the body (prana = life force) via a deep breathing technique.  And life force is exactly that – you need life force to keep the body alive!  We can go weeks without food, days without water but only a few minutes without air!

The breathing will also prepare the body for the following postures as it allows for deeper concentration by working on the nervous system and therefore is great to alleviate irritability.  (Remember the old saying – “take a deep breath and count to 10…”) – now you know why!

You may have heard the expression that we only use 10% of our brains – same goes for the lungs.  This technique helps us to learn to use the other 90%!  It can be a little bit hard to master so if you are new or fairly new you may wish to watch a couple of breaths before you join in.  It takes a bit of coordination – well it did for me anyway!

You inhale by the nose and exhale by the mouth but both through the back of the throat so it should sound like a “HAH” sound.  (It is also best to inhale through the nose inbetween postures throughout the whole class by the way – a tip I learnt from another teacher as it really keeps you much more centred, strong and calm).  Take the full six seconds for each inhale and each exhale instead of taking a big gasp in one go and letting it out in one big blast too!  “Low slow flow” as Bikram would say!

All ten fingers need to be interlocked and always maintain contact with the underside of the chin another time for the”full grip” as you so often hear in the dialogue throughout the class.  When you inhale you need to open the elbows out so you can take in more air as you expand the lungs and bring your elbows up as high as you can and as close to the side of the head as possible.  The stomach should be sucked in and you should be able to see the rib cage in the mirror as your lungs expand.  (Open chest and sucked in stomach is mentioned in many of the postures and after 18 years I finally noticed that – sometimes it takes a while for the penny to drop!)

When the head goes back (slowly – not a jerk back) on the exhale, remember to relax that neck again (let go!) and bring your elbows gradually to the front so they meet on the 6th second as high as you can i.e. level with the shoulders and as far away as you can from the chest.  Make sure you exhale open mouthed to expel toxins.

It is a must to keep your eyes open so you are totally present in the body and not floating off to some other universe.  Now you may feel a little dizzy – that is quite normal as this deep breathing is not your normal type of day to day breathing.  One great adjustment which I noticed I needed to do was to stop straining my neck and consciously relax the neck and shoulders and that relieved the tension I often felt in my arms and shoulders.  Again I believe tension and indeed some pain we feel can be a resistance to just let go and it manifests as tension and ache.  This is a big subject and I will explain more in later posts but I can tell you being aware of when I was tensing up really worked for me.

Bikram dialogue has a lot of detail but you will find a consistency throughout the postures once you get more acquainted with them.  Toes and heels together – feet going straight forward not splayed out at “ten to two”!  The weight is also on the heels.  The detail makes all the difference.  Keeping your body straight (don’t lean back) and in alignment is also necessary to keep that energy flowing properly and as the dialogue says “hip muscles solid, concrete” and a little bit forward on the exhale – forever opening up those pesky hip joints!

So to summarise the key points:

  • Maintain the connection between the knuckles and chin throughout the posture
  • Use the nose and mouth only as a passage way as both inhale and exhale should be through the throat
  • Toes and heels together, feet straight forward, weight on the heels
  • Relax the neck and shoulders
  • Low slow flow by synchronising your head and arm movement – its like a cycle – no jerky movements
  • Take the full six seconds for each inhale and exhale
  • Expand the lungs and suck in the stomach and hold it in during the inhale until you can see the rib cage visible in the mirror
  • Keep your eyes open all the time or you will feel dizzier
  • Exhale as much as possible – elbows meet on the 6th second
  • Bring your elbows as high as the shoulders and as far away from the chest as possible when the elbows meet
  • Try not to collapse the chest as you start the next round
  • Know you are now well prepared for the class!

I hope this helps!  Half moon posture is next!)

PS.  If you are an athlete try a few rounds of this breathing technique before you start – it could just give you the edge!

Bevx

Filed Under: Athletes and Sport, Posture tips Tagged With: 26 +2, athlete, Bikram Yoga, detox, life force, pranayama breathing, spine, standing deep breathing

Yoga leggings, other leggings and capris are now available in the shop

image of surf's up yoga leggings
Over 80 different Yoga Leggings designs are now available in several sizes. They can also be purchased in a plainer style in both long and capri lengths. These can be used for yoga and also as a welcome addition to any wardrobe! Click here to go to the shop and browse the many designs available.

Basic information for first timers

Welcome to Bikram Yoga!
If you have never attended a Bikram class before there may be a few things that you need to know. Bring a mat and a towel to put on top of it. If you wish to shower on site you will need another towel for that. Make sure you drink lots of water throughout the day as you will sweat. Also do not eat anything for about 3 hours before class. Wear something you can stretch in and nothing too baggy or it will feel hotter. We don't drink water until after Eagle Pose - not too long to wait and remember you can drink before class starts! Take it easy on your first class - just get used to the heat and the environment. Smile and come back next time!

Recent Posts

  • Yoga Planners and Journals
  • Teaching Bikram’s again and loving it! Barefoot Bodeez Vinyasa classes also available
  • The Simply Divine Way to Create Your Ideal Body – new Ebook available on Amazon
  • Posture #10 – Standing Separate Leg Head to Knee
  • Posture #9 – Triangle

Archives

  • October 2019
  • January 2017
  • June 2016
  • July 2015
  • June 2015
  • May 2015
  • April 2015
  • March 2015

Yoga Leggings and Capris are available in my online shop

image of surf's up yoga leggings
Over 80 different Yoga Leggings designs are now available in several sizes. They can also be purchased in a plainer style in both long and capri lengths. These can be used for yoga and also as a welcome addition to any wardrobe! Click here to go to the shop and browse the many designs available.

Please follow & like us :)

RSS
Follow by Email
Facebook
Facebook
  • Home
  • About
  • First timers
  • Classes
  • Blog
  • Yoga Wear

Copyright © 2025 Website designed by Beverley Brown