Bikram Yoga Classes in Jersey

Please share if you like this site

  • Home
  • About
    • About Bikram Choudhury and his Yoga Method
    • About the Teacher
  • First timers
  • Classes
  • Blog
  • Yoga Wear

Why does Bikram Yoga use heat?

May 20, 2015 By Beverley Brown Leave a Comment

Bikram Yoga is practiced in a hot room for a number of reasons – too numerous to detail in this post – however I can at least explain a few.  Of course one obvious reason is that the heat allows the body to feel more flexible and therefore can help the student to get into the postures,  reducing the chance of injury.   However that doesn’t mean you should abandon all awareness of what your body can do today – mind/body connection AND awareness should be paramount!  Some days you may be more flexible than others – and that’s OK!  It’s all part of a fascinating process!

The heat also serves as a detox  – not only a physical detox as you will sweat but it also provides a mental and emotional detox too.  For a beginner it encourages the practice of controlling the mind as of course it will feel a bit different if you have never worked out in heat before.

Remember however, whatever you put your focus on will increase so it is prudent to concentrate more on you than the heat.  By focussing on the heat you will give it more power and you don’t want to give your power away to something outside of yourself!  You have a far greater inner power which is waiting to serve you  – all it needs is your acknowledgement and your attention.

The “outer” is nothing compared to the “inner” so if you feel the heat – don’t get out of the kitchen / or yoga class! – just focus on your heart and BREATHE – that is where the power is to overcome what you think is bigger than you.  By doing that, it keeps you calm and you realise that the heat is not a problem at all.

After a few classes you will begin to love it – or even better you won’t even notice it at all, as all your attention will be on the wonderful you!

The Benefits of Heat in a Bikram Yoga Class:

  • Allows the body to get deeper into the postures
  • Physical detox when sweating
  • Emotional and mental detox as the control of the mind is increased
  • Allows you to prove your inner power
  • Melts and moulds stiff and brittle fascia in the body keeping the organs working well
  • Can help to mould your body into it’s lovely new shape!
  • and more….

Bevxx


Filed Under: General, Newbies and nearly newbies, News Tagged With: Bikram Yoga, breathing, detox, Fascia, fire, focus, Heat, release toxins, sweat

Posture #7 – Balancing Stick Pose

May 16, 2015 By Beverley Brown Leave a Comment

Balancing Stick Posture
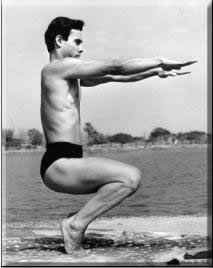
Here is the next in the series of Posture Tips – the powerful Balancing Stick Pose!

(10 seconds in this posture is reputedly to be the equivalent to 10 minutes on a treadmill – I know which I prefer!)

The last of the “three” balancing postures is a doozy!  This posture is only held for 10 seconds but can be a great workout for the whole of the body.  As with all Bikram postures I believe preparation and alignment is key to not only getting the best out of a posture but also making it more enjoyable.  Nothing feels great if you are just trying to hang in there and the body is all twisted so prepare first and you’ll find it really helps.  It’ll tone you up much more too!

This one takes your determination and focus as you are not really in a natural position for the body – standing on one leg and trying to keep the body and arms parallel to the floor is not something the body is accustomed to!  But it can be done!

Preparation for Balancing Stick Pose

Start as normal with your feet together and raise the arms up – hands just like in Half Moon Pose i.e. place the palms together right to the wrist, interlock the fingers and release the index finger and cross the thumbs.  This makes the body know you mean business!   Just like most the postures keep the head glued in between the arms and don’t let the two body parts separate.  Most beginners will try and keep their head up to see where they are going but when the head and arms are separated the energy is dissipated and you won’t feel as strong.  Keep the chin up so you can breathe and bring the body back a couple of inches – this will again open up the chest allowing you to have more puff for the posture!

As you inhale, take a big step forward on the right foot and then ensure both knees are locked.  I find if I point my left toes too it really allows the leg to be straight – both legs locked to begin with gives you a lot of “oomph” to do this posture.

Let’s go – 10 seconds only!

Then in one piece the whole body pivots like a see saw and then comes to a balance in the middle.  I often say to my students – imagine you are like a steel bar with no bends in the middle – that’s how much you need to keep straight so you don’t end up like the “broken umbrella” as Bikram so eloquently puts it!  Broken umbrellas – weak, steel bars – strong!  Imagine yourself in a T – parallel to the floor – you can feel it when you have it.

Keep those legs locked and toes pointed and you’re sorted!  The other challenging part is keeping the arms upright – mine tend to try and dive bomb a bit and your arms will pull you down if you let them.  So again it’s just practice to keep lifting them so they stay parallel to the floor.

While you are in this posture there is no let up – try to continuously stretch forward and backward as if someone is pulling your foot and another is pulling your arms – like a good ol’ tug-o-war! One  of Bikram’s favourite words for the arm part is “as if the scapula is coming out of the body”!  Body down  – leg up – every muscle contracted!

You will need to look forward but keep the head down securely cradled in between those lovely strong, locked arms!  Where your eyes go your body will follow – you want to go forward so look forward!

Once you start to improve on this posture after lots of practice you can start to fine tune – like rolling the hip of the airborne leg down a bit to ensure your hips are parallel to the floor.  Then you can gauge whether your legs or arms need to be higher or lower but all this comes in time and when you are ready to make some improvements.

At last the 10 seconds are over, inhale and come back to centre.  Rinse and repeat on the other side and then give the second set all your muster!  I feel worked out just by writing this!

Summary of the Main Points of Balancing Stick Pose

  • Keep the arms strong by locking them and glueing the palms together
  • Head is glued in between the arms throughout the posture
  • Body is back a little – open the chest to allow you to inhale properly
  • Keep the chin away from the chest so you can breathe
  • Pivot the whole of the body in one piece – don’t separate at the waist!
  • Eyes forward – look forward
  • Keep every muscle contracted for the whole posture, stretching forward and pointing toes
  • Aim to keep the arms and legs locked
  • Pull in the tummy – that will give you a lot of core strength to hold this posture more easily

The Benefits of Balancing Stick Pose

  • Opens up the chest and works the heart
  • Develops determination, focus and concentration
  • Increases body strength like nothing else!
  • Tones up every part of the body and it only takes 10 seconds – love it!

Next up is Standing Separate Leg Stretching – my favourite “feel good” posture!

Speak soon…

Beverley x


Filed Under: Athletes and Sport, News, Posture tips Tagged With: balancing stick, Bikram Yoga, cardio, strength, tone up

How Bikram Yoga was introduced to the West

May 13, 2015 By Beverley Brown Leave a Comment

I love the fact that yoga has been around for thousands of years – in India at least.  Then you can trust that it is not just a fad – it has a solid foundation that has been proved to assist the body, mind and soul for millennia.  It is only relatively recently that people in the West have been introduced to the practice.

By the way, Hatha Yoga is the name given to the physical type of yoga (there are many types) and the Bikram Method is just one type of Hatha Yoga.  Bikram’s is reputed to be the most hard working, dynamic, challenging and effective series of postures as it works every muscle, tendon, ligament, internal organ, every inch of the spine – you name it – it gets worked – right down to the cellular level.

What you may not know is that it was the Hollywood actress Shirley Maclaine who originally “found” Bikram on one of her spiritual journeys through India and it was her who persuaded him to come to the United States to establish his type of yoga there as she felt it could help people from all walks of life.

It caused quite a stir especially in Hollywood where many stars, celebrities, and professional sports people sweated their butts off in classes taught specifically by Bikram Choudhury himself – the founder of this ground breaking yoga system.

The first Bikram book was published in the Seventies and it was this book that I studied and practiced from every day for 12 years in my bedroom before waking up suddenly one morning with an absolute knowing that I had to teach it!  Over the decades it has spread dynamically around the world, myself being the second person in Europe to have been trained in this system.   I originally brought it to Jersey in April 1997 and it took the island by storm!

It is definitely a challenging workout but my aim in teaching is to impart the importance of what I believe it is really about and that is a “body mind connection” experience.  The more harmony you can create between your body and mind the better your body will be.   Once you can establish that it is amazing what your body will do!

Bevx

Filed Under: General, Newbies and nearly newbies Tagged With: bikram choudhury, Bikram Yoga, body mind connection, hatha yoga, shirley maclaine

Posture # 6 Standing Bow Pulling Pose

May 4, 2015 By Beverley Brown Leave a Comment


Bikram Choudhury doing Standing Bow Pulling Pose

Aah – a personal favourite!  Why?  Because I love the challenge of it!  Even after many years of practice I have to give this one my all! It is actually the posture that I used to get nervous about  –  mainly because I would get mad at myself if I couldn’t hold it.   As often is the case, I made peace with the posture and now I love it!

Thank goodness, I no longer get cross with myself if I have to come out or even if I fall out – I simply get back in and use the time I have.  Funnily enough, once you take the pressure off yourself of trying to hold it you usually can!  The first set is held for 1 minute and the second just 30 seconds.

Here is how it goes.  A summary is repeated at the bottom if you prefer.

Preparation for Standing Bow Pulling Pose

As this is the second in the group of 3 balancing postures, as usual you start with your feet facing straight forward and bring your right hand out, palm facing up. Thumbs and fingers together as Bikram says “as if you are holding money in your hand” and you don’t want to drop it!  Then you bend your right knee and grab the foot which is now behind you with your right hand from the inside at the ankle.  This may feel strange as usually this posture is practised by holding from the outside of the foot but with the Bikram method it is slightly different.  Make sure you have that nice tight grip and that you don’t lose it.  Then to stabilise yourself, the left arm goes up very close to the head.  Again fingers and thumbs together so your hand is kind of like a paddle and  your arm is locked and strong.

Focus and final preparation for Standing Bow Pulling Pose!

Now it’s time to get your focus by gazing at your standing knee  which as usual should be locked throughout the posture so you have that “concrete lamppost in place” true Bikram style!  Concentrate on that and it will give you a lot of strength.  Make sure your knees are together at the start and the hips will automatically be square on the mirror.  This will avoid doing the “surfing stance” which brings the body out of kilter before you start!

As you inhale, charge the body forward towards the mirror as if you are trying to touch it with your fingertips, and at the same time, kick your right leg back and up towards the ceiling.  You bring the body down from the lower spine until the chest and abdomen are parallel to the floor.  This is possible as you are constantly stretching your left arm towards the mirror and this will lead your body down.

As a beginner you may have a tendency to just try and “hang in there” for the duration of the posture (counting down the seconds no doubt) but as in all Bikram postures by being proactive with the instruction you will find it will make each posture easier not harder as you may think!  Every little detail helps to create more strength and eventually more ease.  In the old days there were some little details I would try and get away with not doing, only to find when I did make the effort to listen more and do what was in the dialogue that the posture became soooo much easier!  I was surprised but I have since found that to be true on all the postures now – it’s like one day there is an “aha moment” and your body just starts to get that feeling of “oooohhh – that’s what its meant to feel like!”   I have heard this from other students too so I know that this is quite a common occurrence.

So in the case of Standing Bow Pulling Pose it requires you to continuously kick your leg back and up as hard as possible and eventually your foot will be visible above your head “like a red indian feather sticking up!”  If it seems like you’ll never see that foot in the mirror – don’t despair just try moving the foot away from the buttocks first and then kick up. As usual there is always more to aim for (what’s new?) if you’re game and that is to get both feet in one line down the centre.

Keep on kicking back so eventually you can’t see your right shoulder in the mirror as it is behind the left shoulder and therefore invisible in the mirror.   Keep on stretching your left fingers towards the mirror and you will find you gain so much more poise and strength to enable you to hold longer.  The dialogue then says to try to touch your shoulder to your chin.  Now it doesn’t say try to touch your chin to your shoulder – why? Because if you move the direction of your head you will lose the balance and alignment.  The head should stay straight as “where your eyes go the body follows” and you will also lose your focus if you turn your head.  So you keep your head facing straight and bring the body parts in towards the centre.  The dialogue will keep you on track every time!  Eventually both shoulders will be in one line.

Kicking and stretching should be 50/50 – that ensures your balance and if your standing leg is locked too – those three things – as Bikram famously used to tell us ” You can balance there for EVVVEEEERR!”  I think that could be a tall order but you get the idea!  The rest of the posture is continually keeping the standing leg locked, stretching forward and kicking up until finally the 60 seconds is up – phew!   Then you have the pleasure of doing it all over again on the other side.

The second set of 30 seconds will feel like a doddle now !  Actually joking apart I usually see that the second set seems be so much easier for everyone and this is possibly due to mind over matter again – the extra seconds can play on the mind and you can put too much pressure on yourself.  If you’re the over achiever type of person it may be best to think “who cares?” and just go for it with a light hearted attitude – “bank” the seconds you hold the posture and ignore the rest.  If you come out or fall out don’t judge yourself (judgment does not help your body one iota), just use the time to go in again and practice.  Those three, four, seven, fifteen seconds will eventually merge into being able to hold for the whole time without the breaks if that is your aim of course!

Summary of the main points of Standing  Bow Pulling Pose:

  • Keep thumbs and fingers together with palm up to grab the foot from the inside at the ankle and hold that strong grip
  • Standing leg should have a locked knee and act as that “concrete lamppost”
  • At the start the other arm should be strong and upright very close to the head
  • Both knees together at the start facing the mirror to avoid the “surfing stance”
  • Inhale and charge the body forward until the chest and abdomen are parallel to the floor
  • Keep stretching the stabilising arm forward as if trying to touch the fingertips to the mirror
  • Keep the head straight and touch your shoulder to your chin (not the other way round!)
  • Continually keep kicking up and back with the leg until eventually you can see the foot raise up behind the head (this could take time – no worries!)
  • All three – stretching forward, kicking up and standing leg locked will enable you to keep the balance!

The main benefits of Standing Bow Pulling Pose:

  • Increases both strength and flexibility
  • Tones the legs and arms, lifts the buttocks
  • Develops concentration, focus and determination
  • Shunts blood from one side of the body to the other allowing it to equalize again when standing still in Savasana
  • Acts as an internal massage
  • Flushes blood to the face giving it a glow
  • Relieves back pain as it brings flexibility and strength to the lower spine
  • Works out most of the body’s muscles
  • Opens up the chest and increases lung capacity
  • Great for pregnant women
  • Flushes out the kidneys to eliminate toxins
  • Helps correct high blood pressure
  • Good for tennis elbow and frozen shoulder
  • Improves flexibility of the sciatic nerve
  • Strengthens and firms the abdominal wall, upper thighs, upper arms, hips and buttocks – great all over workout!

Well as usual I’ve gone on a bit!  Just take the bits you need!

Bev x


Filed Under: News, Posture tips Tagged With: all over workout, balance, Bikram Yoga, Bikram Yoga standing series, concentration, determination, flexibility, focus, massage, posture tips, pregnancy, Standing bow pulling pose, strength

Bikram Yoga Postures – Friend or Foe?

April 25, 2015 By Beverley Brown Leave a Comment

When practicing Bikram Yoga you will inevitably find some postures easy but there may be a few that seem incredibly hard!  Perhaps it’s the balancing on one leg bit that challenges you the most or maybe trying to place the head on the knee and not below the knee in the many compression postures.  Often, for someone who has a busy and hectic life or is an ideas type person, the Savasana (the lying down between the floor postures) maybe the biggest hurdle of all!  Everyone is different and can be challenged in different ways.  The person on the left of you may do a near perfect Standing Bow Pulling Pose but find the Triangle somewhat difficult!  So what causes this?

A strange phemonena!

Well one “phenomena” I have noticed happen many, many times over that when something is going to do us “good” or provide some type of freedom for example, there is a part of us that fights that or tries to push it away!  You may have experienced that yourself in other parts of life too.  Sometimes we hold back on allowing ourselves to experience the good stuff and will find a way to “block” it.   I can categorically say from my own experience and from talking to friends, it is quite common.

So what is the posture actually doing?

So what does that have to do with the postures?  Well each posture is placing the body in a certain position to allow it to experience certain things.  Some postures for example, will stimulate organs whilst in the position, bringing the body back into balance when lying in Savasana.  Other postures will stretch the spine out as much as possible and compress the internal organs, others will do the opposite by compressing the spine and stretching out the internals.  Standing Bow Pulling Pose for example will shunt blood from one side of the body to the other and then stimulate a balance of the two sides of the body when you stand still after the posture.  Others assist greatly in the training of the mind and focus.  And so it goes on.  There is a reason (or rather many) for every posture.  Yoga is holistic, the postures work on other levels too, not only on the physical but also on the mental, emotional and if you are open enough, even the spiritual too.

Don’t fight or resist the posture!

The reason why I have explained the above is that very often the posture that you or your body needs the most will be the one you dislike, or even “dread” the most or find the most challenging!  It is almost like there is an internal (subconscious) fight going on.  I have taught several types of energy work for many years and this is the thing that has fascinated me the most.  We can often put up amazing resistance to the things that will allow us to change something for the better.  It feels easier to stay in the comfort zone instead of challenging yourself to go outside of it!  This is actually a very large subject and I am finding it hard to put into words but I hope you get the gist by the end of this post!

See the posture as the gift it really is!

So what to do about it?  Change your feeling and focus about the posture.  That actually is very easy to do as it is just a thought and feeling.  It may take longer for the body to enjoy the posture but you can change what you think about it in a nano-second!  So instead of seeing it as the posture to dread, or the “punishment” it may feel like at the moment, see it is the “gift” it really is for you.  Have gratitude for what it is doing, even for how it is teaching you something about yourself for example.

Be aware that on some level this posture could give you a freedom that you may never have experienced before. It could give you incredible focussing ability to improve your sport for example.   It could just open you up to many opportunities.

Funnily enough, once you’ve cracked this, more often than not it will then become your favourite posture and the easiest to do!

So is that Bikram Yoga posture your friend or foe?

It is whatever you choose it to be in that moment!

Bevx


Filed Under: Athletes and Sport, General, Newbies and nearly newbies Tagged With: athletics, Bikram Yoga, change your mind, concentration, emotional, focus, friend, gratitude, mental, physical, physical health, posture, spiritual, sport, yoga classes, yoga practice

Posture #5 – Standing Head to Knee Pose

April 21, 2015 By Beverley Brown Leave a Comment

Well as promised here are the tips to assist with Standing Head to Knee Pose.

For me, this posture is the first one of the major balancing postures – I feel it is part of a “group” together with the Standing Bow Pulling Pose and Balancing Stick.  These three postures will work you out physically but really allow and in fact demand from you an increase in concentration, focus and determination of the mind.  I really enjoy them actually as I like the challenge!

For beginners, this is likely to be the first posture where you really get to realise how important it is to lock the knee.  I have been told several ways to think about the locking of the knee – one was to “suck” the muscle to the thigh bone and pull up the knee cap. After a number of classes you begin to experience “muscle memory” and it will get to feel more like a normal action than it is when you first try it!  It will become second nature – eventually, I promise!

In order to write this post I have gone back to my original posture clinic notes and I came across this tip and for some, this may help.  Instead of concentrating on tensing and tightening the leg muscles, you may like to relax and bow the leg back instead.  I had completely forgotten about this until I read it this week!

I am a strong believer if you relax into the postures first instead of resisting them (and even trying too hard) you will greatly improve not only your yoga but it does wonders for your whole well-being too.  This is a part of big subject and something that I have been looking into over many years but it is interesting when I found this note as basically it is saying the same thing!  So if a locked knee is not yet your speciality you may like to change the focus and relax and bow the leg instead!

Kicking the leg out

When you start this posture you shift your weight slightly to the left leg and lift up the right foot.  You will need to interlace the fingers right to the webbing and ensure your thumbs are crossed underneath the foot so you get a good grip and able to keep it throughout the posture!  If you pull your stomach in as you do this, you will be stronger and it will also help your spine as it prevents backache.  The correct position to hold the foot is three inches below the toes.  

Now for the focus of the eyes, which if you have read any of my other posts, will absolutely make you stronger in any posture.  You don’t have to have your eyes bulging out of their sockets, just a gaze at your left knee in the mirror will work wonders!

Now before you go any further in the posture you must ensure your left knee is locked.  I find it helpful if you imagine your leg going down into the ground just like the infamous “Bikram speak” “concrete lamp post”- unbroken – no knee!!  If your knee is not locked do not kick out, just stay there in that position until you gain strength as you do not want to put pressure on a bent knee.

Now it’s time to inhale and slowly kick your right foot towards the mirror until the leg is parallel to the floor – no higher – no lower – at the same time maintaining the lock on the left knee!  WHAT?? you say – yes ‘fraid so – but one day muscle memory will kick in and you will!

Taking another deep breath, continually kick the foot away from you towards the mirror.  Another tip I just got reminded of was instead of focussing on straightening the raised leg, change the focus to pulling the toes back towards you and pushing the heel towards the mirror.  Sometimes just looking at something differently can produce a better result so you can try it!  Don’t forget that pesky left knee to stay locked.  While you are in this stage, open the chest – whenever you do this you will have more energy to hold the posture.

If you fall out even after a few seconds, “bank” that success, and go back in.  Use the whole minute even if you drop out of it several times.  Do not judge yourself but just regain your gaze, and as they say in the UK – keep calm and carry on!  Eventually all the seconds in the posture will add up to the minute or half minute depending which set you are on.

The Next Stage – Elbows Down

The aim is to eventually get both legs locked and looking like an upside down “L” shape and only then it is time to pull your stomach in (if it isn’t already) and bring the elbows down by the side of the calf muscles and eventually they will go down below the calf.  The arms get nicely toned at this point!

The Finale – Head to the Knee!

Head to the knee is the ultimate aim but you only go for this if you have both legs locked.   In order to do this you need to change your gaze to your standing big toe, tuck the chin right in so you compress and then your head has a chance of landing on the knee.  If your head is below the knee you will not get the compression that the posture is aiming for.

If you are not ready to attempt the final advanced adjustment – no worries.  It may take a while.  When you feel comfortable enough with your balance you may wish to give it a go.  Step by step is the Bikram way for all these postures.

Then you get to repeat the whole process on the other leg!  The first set is held for a minute on each side and the second one is an easier 30 seconds only.  Try not to think about the time while you are in the posture just keep your attention on the adjustments and the seconds will be over before you know it!  I have found it is always easier to be “pro-active” in the posture rather than just hang in there waiting for it to be over!  You will improve much faster this way too.

Summary of the Main Points

  • Focus your eyes on your left knee in the mirror to get your balance and strength
  • Make sure you have the proper grip of the foot by interlacing fingers right to the webbing and crossing the thumbs under the foot – this will keep the grip in place
  • Only kick out with the other leg if your standing knee is locked
  • Pull in the stomach muscles throughout the posture as it makes you stronger and works the internal organs
  • Inhale when you raise the leg and concentrate on kicking the heel towards the mirror and toes back towards your face
  • Keep the standing knee locked throughout the posture
  • Open the chest until you bring your elbows down
  • Only if both legs are locked bring the elbows down towards and then below the calf muscles
  • Only attempt the head to the knee if both legs are locked out
  • Change your gaze to your big toe on the ground
  • Tuck in the chest and slowly bring the head to the knee!  Voila!

The Benefits of Standing Head to Knee Pose

  • Develops amazing concentration, focus, patience and determination
  • Works the nervous system and the mind
  • Compresses the internal organs to enable them to function properly
  • Slims and tones the legs like nobody’s business!
  • Uplifts the buttocks
  • Great for the abdominals when the stomach is sucked in
  • Works all the muscles in the legs, arms, and back
  • Strengthens the spine

Next one in the Posture Series is the Standing Bow Pulling Pose.  I will post some other posts in the next couple of days too.

Enjoy!

Bevx

Filed Under: Newbies and nearly newbies, News, Posture tips Tagged With: Bikram Yoga, concentration, determination, focus, mind, slim legs, standing head to knee, standing head to knee posture, standing series, uplift buttocks

Posture No 3 – Awkward pose…. Awkward as…..

April 7, 2015 By Beverley Brown Leave a Comment

Bikram Choudhury in Awkward PoseIf you have ever attended a Bikram class you will be aware that every posture comes with a full set of “instructions” in order to place the parts of the body in the optimal position.  No less with the Awkward Pose!

When doing this pose you will probably feel what it is doing to the legs but be aware it is also working big time on the arms, spine and the heart and a lot of internal areas as is normal for any posture.  By the way it works a treat on breaking down cellulite and toning up those thighs like nothing else does!  So I will include a few of the details that help you get the best out of this posture.

First part:

Firstly the feet should be 6 inches apart with the feet going straight out in front of you – like a perfect letter “H”. If you have the feet in a slight “V” shape (five to one on a clock face) you have already changed the dynamics of the posture.  You shouldn’t even be able to see the heels in the mirror – glue your feet to the floor at this stage!

Bringing the arms up will obviously be working on the heart and it is important to really stretch the arms out right to the fingertips as if you are trying to touch the mirror.  This will also ensure you are strong in the posture, great for your balance and tones the arms up like billy-oh too. “Nothing loose, nothing hanging” – as it says in the dialogue!

Exhale the breath as you need now to suck the stomach in and hold it in.  This area of the body will also give you a lot of strength when pulled in and it also has a positive effect on your organs and even your emotions – if you just let your stomach flop the posture will feel harder to achieve, you’ll just be hanging in there and wasting effort.

Now it is time to sit down until the “hips touch the chair”, spine as straight as possible and with the maximum weight on the heels.  This will assist with straightening the spine ( just like in Half Moon).  The focus should be on pushing the spine backwards.  Remember to keep pulling in that stomach until you can see your rib cage in the mirror.

By this time those pesky knees may have tried to find each other and meet up somewhere in the middle so its time to check that and ensure there is still six inches between them, also the toes (no “V” happening!), heels and even your hands.  Chest up, chin up – so you can breathe and you will feel stronger.  All the time you are trying to lean back to the back wall – almost trying to fall down backwards!

Inhale breathing and come up.

Keep your arms where they are.

Second part:

I make sure my eyes are focussed throughout this posture as I find it really increases my strength and stamina but in this part of the posture it is imperative and hence it is in the dialogue.  “Concentrate and meditate”.

Stand up on the toes as high as you can, making sure you have your concentration and focus on one spot in the mirror.  Now stretch everything up to ceiling – your spine, chest and head, upper body before slowly sitting down but this time with the weight on top of the toes with the spine straight.  Throughout this part it should feel like your hips and back of the head are touching the wall – “Bikram speak” for “straight”!

This time though, you sit down halfway until the hips touch the chair but not too low.   Then it is time to lift the knees up, lift the chest (gives you a lot more strength), lean back to straighten the spine again.  Come up higher on the toes (i.e. lift the heels up more) and continually lift the knees. Make sure that the hips have not sunk too low – they must stay at the height of the imaginary chair and not be lower than the knees.

Inhale as you come out, keeping your arms in the same position, flattening the feet for a second or two – phew!

Third part:

This time you come up a little bit on the toes and now you can do what you have probably wanted to do all along and bring the knees together! Squeezing those knees together will tone up those inner thighs as an added bonus.  Exhale as you suck the stomach in and keep your spine straight as you go down as slow as possible, taking at least 10 counts – ( I know – tell me about it! ) – all the time as if you are leaning against a wall.

Continually stretch your spine to the ceiling until you have 1/2 inch between the hips and heels.  At this point take care not the sink on to the heels, you do this by keeping your knees together and pointing them slightly down towards the mirror.  By this time your arms, and legs will be parallel to the floor and the spine straight in a 90 degree angle, as if you are like a three sided box.

To come up in control take a deep breath and keeping the knees glued together come up with your spine straight trying not to lean forward.   Always move slowly – there is power in slow movement.

On the second set if you have good knees you can do the famous Bikram motorbike riding to make sure you have control – but do NOT do this if you do not have strong knees – always take care of the knees!

As usual, ensure your shoulders are relaxed throughout the posture – there is no need to create tension where you do not need it!

Summary of the main practice points:

  • Keep the feet glued to floor once they are there and make sure they stay like an “H” – not “V’
  • Keep your focus by gazing at one spot in the mirror
  • Suck the stomach in
  • Try to touch the fingertips to the mirror – i.e. straight arms – nothing loose, nothing hanging, contract the arm muscles
  • Open the chest to gain more strength and stamina
  • Try to straighten up the spine as much as possible
  • Do not let the hips sink down lower than the knees
  • Keep the correct position of the knees depending on which part of the posture you are in

With every posture there are benefits on many levels – the main ones for Awkward Pose are:

  • Stimulates the internal organs for correct functioning
  • Tones and strengthens the arms
  • Tones and strengthens the legs
  • Works on the heart
  • Assists with straightening out the toes
  • Breaks down cellulite – bonus!
  • Great for your abdominal muscles
  • Gives lovely muscle definition on the thighs
  • Strengthens and aligns the spine

Filed Under: Posture tips Tagged With: awkward pose, Bikram Yoga, heart, posture, posture hints, posture tips, slim legs, spine, tone legs

Posture No 2 – Half Moon Pose and Hands to Feet Pose

March 28, 2015 By Beverley Brown Leave a Comment

Well, as promised here are a few more details about this posture.  I went a bit OCD so if you don’t want to read all this you can scroll down to the summary for the main points – of which there are many in this one!  These tips are not for home practice by the way – they are for students that already go to a Bikram class where the environment is specifically geared to accommodate the Bikram method of doing yoga.  It is merely for those who may enjoy understanding a bit more about the postures they already practice in class.

The Half Moon is a “full-on” posture as it really works both the outside and the inside of the body – in fact it’s like a mini workout in itself!  The first set is held for one minute on each side and the second set for only 30 seconds which feels very fast compared to the first set!

I must say this used to be the posture I would dread!  When I first started do you think I could get my arms anywhere near my head or even pointing upwards?  Not a chance!  – they were very much pointing out in front of me and I found the posture extremely hard.    It is difficult to explain how that shifted but shifted it did.  One thing I had to change however was how I felt about the posture – as I said previously I could not wait for this posture to be over and I used to fear it and do it with such trepidation!  I will try and explain more in later posts how you can change how you feel about a posture and it is not something that may happen immediately but once you do you will find a big difference.

Anyway here is a run down of the posture that may help:

The Side Bends

First of all there is a warm up as this is the first stretching posture in the series.  The hand grip should be tight with the palms together right down to the wrist.  They can sneakily come apart during the posture but every effort you make to glue the palms together will strengthen the arms eventually making the posture easier.  Stretch up as high as you can and bend a few times from left to right making sure you feel the stretch on each side of the body.  The posture is called “Half Moon” so the body should make a crescent shape!

After the warm up, its time to work on the initial alignment.  Try and keep your head glued in between your raised arms rather than allowing the head to drop and causing a droop and a bent neck. Again easier said than done in your early classes I know – but I am a strong believer if you take care of the alignment in the early classes it will be easier in the long run and again become more automatic.  Your elbows should be locked to ensure no bent arms – as you get used to the straight arms you will feel stronger quicker.  This can be an area that is difficult but one day you may find all of a sudden your arms are straight.  That is exactly what happened to me so never think what you are experiencing today is what you are stuck with.  Things can change and sometimes surprisingly quickly.

Naturally as with many Bikram postures you start with toes and heels together i.e. feet facing forward not “ten to two” and legs together not apart.  You have a much stronger base if you have your feet and legs together.  Bring the weight on to the heels.   Of course as usual with Bikram postures you need to lock the knees which really means lifting the knee cap up as much as you can.  You do this by contracting your big quad muscles – one teacher suggested almost “sucking them to the bone” to ensure the knee cap is lifted.  If your knees are bent you will put too much pressure on them and you don’t want to feel “weak-kneed” in this posture!   Of course locking the knee is not a normal daily action so it takes a bit of doing to keep it consistent but if you are a beginner just work at it second by second.  After a while it will seem very normal and will be almost automatic.

Remember to keep the weight on the heels as there is tendency to lift one up and place the weight on one foot but both heels should be on the floor and the weight distributed.

The hips are slightly forward to open up those lovely hip joints and the upper body leans back a little to open up the chest and rib cage.  When the chest is open you will feel a lot stronger physically than if you are “pidgeon-chested”.  Bikram Yoga postures are specifically designed to open up the body – again something that we may not naturally do.

Make sure your chin is away from the chest so you can breathe easily and before you start meditate, concentrate and focus by keeping your eye fixed on one spot.  Just that action alone gives the body such increased strength – you’ll be amazed!

Before each side bend take a deep breath and stretch up to the ceiling first then slowly stretch to the side.  It is much better to stretch just a couple of inches to the side and stay in that strong alignment than it is to bend over a foot and be twisted – tempting though it is when you look in the mirror!  You will whittle down those hips and waist easier too as you will feel an intense stretch on the other side of the body.  The side that is compressed is working on your internal organs.  Learn to love that feeling!

So what about the breathing?  More recently I had this clarified – take a deep breath as you stretch up to the ceiling, hold it until you are in the side position and then breathe normally.  If this is not easy for you just breathe normally throughout – but whatever you do don’t forget to breathe or you will tire quickly!

A minute does seem a long time but if you move slowly and “be” the posture rather than “do” it, it will pass quick enough.  Just keep your ear on the dialogue and adjust as necessary – there is always something to pass the time with!  Like pushing your hips “beyond your flexibility”!  There are reminders throughout the dialogue to keep you in the right alignment.  Rolling the opposite hip slightly forward and then bringing the bent side’s shoulder forward slightly so that the chest is opening more and almost facing the ceiling is the last adjustment.   In the last 3 seconds or so go a little bit past the comfort zone and push more! Inhale as you come out and stretch up to the ceiling before doing the other side.

The Back Bend

Then of course there is the back bending part of the posture.  Again the dialogue will keep you safe as it gives you step by step instruction.  As a beginner, the first thing you have to get used to is to let your neck relax and drop the head back.  It will be impossible to do any sort of backbend unless you let your head go back first.  As in many other postures your head will lead you.  So concentrate on that first or should I say relax first!  When you are in the back bend bring the arms back towards the head – as much as you can anyway.  Again this will come when you are more comfortable in the posture.  As you push your hips forward and keep the weight on the heels you will be very safe! Eyes open of course – always.

The Forward Bend

The last part is the forward bend.  Bend your knees if you need to so you can put your hands on the floor in front of you.  Loosen out the hips and squat right down if it helps you to loosen the lower back.  Move slowly and always be aware of your own body in this moment.  Once again there is a Bikram grip where you have to get as low as you need to grab the heels from behind so that the pinkie fingers touch and the elbows stay behind the calf muscles.  Quite a feat but do whatever you can and work on that each time.  Using that famous grip (fingers together with the thumbs) you stretch your body down from the lower spine but only as far as your body stays glued to the legs.  If the body and legs come apart you have lost the integrity of the posture.  So once again it is better to keep your legs bent with the body glued to the legs that have straight legs and the body away from the legs.  You are wanting to create the infamous “Japanese ham sandwich” effect!  It is the continuous pulling on the heels “without interruption – without intermission” that may eventually allow you to lock the legs.  If this is a long way off for you it doesn’t matter – as long as you are keeping your body jammed to the legs and pulling on those heels you will still get 100% benefit.

As with all the postures in the Bikram series you can always get 100% benefit even if you don’t get  to the ultimate position – the dialogue will give you detailed instruction to get the most benefit for you.  It’s not about having to be perfect in the posture but a case of sticking to the instruction.  This way improvements will be fast and you will always be getting the most benefit for you that day.

The second set should feel easier and is only half as long – yea!

That was a bit of a long essay but it is a big posture!  It will be impossible to adjust or even think about all this in one go so just work on one or two points in each class and go from there!

Summary of the main points to look out for:

  • Concentrate and fix your gaze on one spot to give you focus and strength
  • Keep breathing with your chin away from the chest
  • Palms glued to the wrist throughout the posture
  • Locked elbows and locked knees throughout the side bends
  • Lean back a little to open the chest and push hips forward
  • Stretch in alignment even if only a few inches
  • Push or “sway” your hips out to the side “beyond your flexibility”
  • Weight on the heels – both heels on the floor
  • Hold and push a little more in the last few seconds of the side bend
  • Relax the head and neck before the back bend
  • Arms back towards the head in the backbend
  • Hips must be forward towards the mirror by squeezing the butt muscles and keep the weight on the heels for a safe backbend
  • Eyes open – always
  • Get the proper grip on the heels and continual pulling in the forward bend
  • Keep your body together with the legs even if you have to keep your knees bent
  • Do the posture with “your smiling happy face”!

Some of the benefits of the Half Moon posture are:

  • Great for slimming and toning the waist, hips, abdomen, and buttocks
  • Encourages the internal organs to function properly
  • Aligns the skeletal system
  • Strengthens the arms
  • Good for focus and determination
  • Opens up the body
  • and more….

Next up will be Awkward Pose in a few days time.  I will try and make it shorter!

Have a great weekend everyone!
Bevx

Filed Under: Posture tips Tagged With: back bend, Bikram Yoga, bikram yoga in jersey, forward bend, half moon pose, half moon posture, posture hints, posture tips, side bends, slim, stretch, tone up, workout

Posture No 1 – Pranayama breathing a.k.a. Standing Deep Breathing

March 24, 2015 By Beverley Brown

Well as promised I will give some more info on the postures.  Because of timing and the already detailed instruction there is not much time to add in more in the class so I hope these blogs will help!

yoga girl doing Bikram Yoga's standing deep breathing posture

Every Bikram class starts with Pranayama Breathing – 10 sets done twice.  Bikram always told us that this actually was the most important posture of all! Why? Because it gets the heart and lungs to work together properly providing a smooth flow of life force through the body (prana = life force) via a deep breathing technique.  And life force is exactly that – you need life force to keep the body alive!  We can go weeks without food, days without water but only a few minutes without air!

The breathing will also prepare the body for the following postures as it allows for deeper concentration by working on the nervous system and therefore is great to alleviate irritability.  (Remember the old saying – “take a deep breath and count to 10…”) – now you know why!

You may have heard the expression that we only use 10% of our brains – same goes for the lungs.  This technique helps us to learn to use the other 90%!  It can be a little bit hard to master so if you are new or fairly new you may wish to watch a couple of breaths before you join in.  It takes a bit of coordination – well it did for me anyway!

You inhale by the nose and exhale by the mouth but both through the back of the throat so it should sound like a “HAH” sound.  (It is also best to inhale through the nose inbetween postures throughout the whole class by the way – a tip I learnt from another teacher as it really keeps you much more centred, strong and calm).  Take the full six seconds for each inhale and each exhale instead of taking a big gasp in one go and letting it out in one big blast too!  “Low slow flow” as Bikram would say!

All ten fingers need to be interlocked and always maintain contact with the underside of the chin another time for the”full grip” as you so often hear in the dialogue throughout the class.  When you inhale you need to open the elbows out so you can take in more air as you expand the lungs and bring your elbows up as high as you can and as close to the side of the head as possible.  The stomach should be sucked in and you should be able to see the rib cage in the mirror as your lungs expand.  (Open chest and sucked in stomach is mentioned in many of the postures and after 18 years I finally noticed that – sometimes it takes a while for the penny to drop!)

When the head goes back (slowly – not a jerk back) on the exhale, remember to relax that neck again (let go!) and bring your elbows gradually to the front so they meet on the 6th second as high as you can i.e. level with the shoulders and as far away as you can from the chest.  Make sure you exhale open mouthed to expel toxins.

It is a must to keep your eyes open so you are totally present in the body and not floating off to some other universe.  Now you may feel a little dizzy – that is quite normal as this deep breathing is not your normal type of day to day breathing.  One great adjustment which I noticed I needed to do was to stop straining my neck and consciously relax the neck and shoulders and that relieved the tension I often felt in my arms and shoulders.  Again I believe tension and indeed some pain we feel can be a resistance to just let go and it manifests as tension and ache.  This is a big subject and I will explain more in later posts but I can tell you being aware of when I was tensing up really worked for me.

Bikram dialogue has a lot of detail but you will find a consistency throughout the postures once you get more acquainted with them.  Toes and heels together – feet going straight forward not splayed out at “ten to two”!  The weight is also on the heels.  The detail makes all the difference.  Keeping your body straight (don’t lean back) and in alignment is also necessary to keep that energy flowing properly and as the dialogue says “hip muscles solid, concrete” and a little bit forward on the exhale – forever opening up those pesky hip joints!

So to summarise the key points:

  • Maintain the connection between the knuckles and chin throughout the posture
  • Use the nose and mouth only as a passage way as both inhale and exhale should be through the throat
  • Toes and heels together, feet straight forward, weight on the heels
  • Relax the neck and shoulders
  • Low slow flow by synchronising your head and arm movement – its like a cycle – no jerky movements
  • Take the full six seconds for each inhale and exhale
  • Expand the lungs and suck in the stomach and hold it in during the inhale until you can see the rib cage visible in the mirror
  • Keep your eyes open all the time or you will feel dizzier
  • Exhale as much as possible – elbows meet on the 6th second
  • Bring your elbows as high as the shoulders and as far away from the chest as possible when the elbows meet
  • Try not to collapse the chest as you start the next round
  • Know you are now well prepared for the class!

I hope this helps!  Half moon posture is next!)

PS.  If you are an athlete try a few rounds of this breathing technique before you start – it could just give you the edge!

Bevx

Filed Under: Athletes and Sport, Posture tips Tagged With: 26 +2, athlete, Bikram Yoga, detox, life force, pranayama breathing, spine, standing deep breathing

So what’s so different about Bikram Yoga?

March 19, 2015 By Beverley Brown

The Bikram Method of yoga is one of the most popular types of yoga out there.  Wherever and whenever you go to a 90 minute Bikram class you will get the same workout.  26 postures – most of which are done twice – each one specifically designed to work the body in a certain way and in a certain order.  For some people it may sound a bit boring to have the same workout each time but quite honestly it is anything but that!  Having the same postures to do each time allows you to have your own “benchmark” in some ways as you will feel the difference from class to class in each posture and can measure your own progress if that interests you.  By the way some days you will find the postures easier than others – it doesn’t matter – it’s all good!  In another blog sometime in the future I will explain why that happens.

The instructor will give a “dialogue” for each posture and there are several reasons for it.  The instruction is specifically designed to protect and assist the student in getting the most benefit from each posture.  The instructions are somewhat detailed and I actually love that as it assists new students to improve quickly so that no effort is wasted.

Of course when you first start you may only hear about 10% of the dialogue – that is all very normal!  There’s a lot going on!  Each class after that you will pick up more each time and eventually get some “aha” moments!

I’ll write more about this soon …

Bevx

Filed Under: General, Newbies and nearly newbies Tagged With: Bikram Yoga, Bikram yoga method, challenging, detox, sweat

  • « Previous Page
  • 1
  • 2
  • 3
  • Next Page »

Yoga leggings, other leggings and capris are now available in the shop

image of surf's up yoga leggings
Over 80 different Yoga Leggings designs are now available in several sizes. They can also be purchased in a plainer style in both long and capri lengths. These can be used for yoga and also as a welcome addition to any wardrobe! Click here to go to the shop and browse the many designs available.

Basic information for first timers

Welcome to Bikram Yoga!
If you have never attended a Bikram class before there may be a few things that you need to know. Bring a mat and a towel to put on top of it. If you wish to shower on site you will need another towel for that. Make sure you drink lots of water throughout the day as you will sweat. Also do not eat anything for about 3 hours before class. Wear something you can stretch in and nothing too baggy or it will feel hotter. We don't drink water until after Eagle Pose - not too long to wait and remember you can drink before class starts! Take it easy on your first class - just get used to the heat and the environment. Smile and come back next time!

Recent Posts

  • Yoga Planners and Journals
  • Teaching Bikram’s again and loving it! Barefoot Bodeez Vinyasa classes also available
  • The Simply Divine Way to Create Your Ideal Body – new Ebook available on Amazon
  • Posture #10 – Standing Separate Leg Head to Knee
  • Posture #9 – Triangle

Archives

  • October 2019
  • January 2017
  • June 2016
  • July 2015
  • June 2015
  • May 2015
  • April 2015
  • March 2015

Yoga Leggings and Capris are available in my online shop

image of surf's up yoga leggings
Over 80 different Yoga Leggings designs are now available in several sizes. They can also be purchased in a plainer style in both long and capri lengths. These can be used for yoga and also as a welcome addition to any wardrobe! Click here to go to the shop and browse the many designs available.

Please follow & like us :)

RSS
Follow by Email
Facebook
Facebook
  • Home
  • About
  • First timers
  • Classes
  • Blog
  • Yoga Wear

Copyright © 2025 Website designed by Beverley Brown